Exterior House Painting Guide
May 16, 2024
If the paint on the outside of your home is chipping, it’s been several years since your home was last painted, or you want to freshen up your home’s look with a new paint color, you may be looking into your options for exterior home painting.
How you approach your exterior painting project can significantly affect the final look. Factors such as the time of year you decide to hire a painting service and whether you clean your home’s exterior first can impact the outcome. Learn more in this home exterior painting guide.
The Best Time to Have the Exterior of Your House Painted
The ideal time to have professionals paint your home’s exterior is during the dry season when the weather is warm but not too hot. You’ll want to avoid having someone paint during the rainy season or amid extreme temperatures, such as in the dead of winter or the peak of summer.
Generally, the best time to have professionals paint your house exterior is during the late spring or early fall when temperatures are moderate and rainfall is minimal. Warm temperatures allow the paint to dry and cure properly, providing the best results.
When Not to Paint
Painting during wet or cold conditions can cause the paint to not properly adhere to the surface, resulting in an uneven finish that can peel or bubble over time. Painting in scorching weather can cause the paint to dry too quickly, creating an uneven finish.
If the surface is dirty, greasy or has mildew, you’ll need to clean it before the professionals arrive to paint. Otherwise, the paint won’t properly adhere to the surface and won’t last as long. Another time to stop is if the surface is damaged or has cracks. It’s best to fix those issues first. Make sure to repair any damage or have professionals repair the damage before scheduling a painting.
Although getting your home painted is exciting, there’s no need to rush the process. For the best results, try to prep your home and wait for the best season before scheduling your painting services.
Painting professionals like Shoreline Painting get the job done right. Our painters take time to prep and only paint during optimal weather conditions.
Learn More About IExterior Painting
Exterior Paint Type & Color
Choosing an Exterior Paint Type
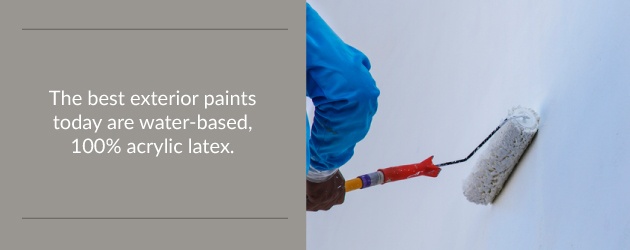
Before you begin painting, you need to determine the type of paint you’ll apply to the outside of your home. Although oil-based paints were once the norm, the best exterior paints today are water-based,100% acrylic latex. The formula consists of three main parts:
- Pigments: These give paints their color.
- Binders: These help the pigments adhere to the surface.
- Solvents: These help the paint spread more easily.
When paint dries, the solvent evaporates and leaves behind the pigments and binders — which together are known as volume solids. Generally speaking, the higher quality the paint, the higher percentage of volume solids. Better paints may also have better binders, which makes them more durable.
You can find out the percentage of volume solids in a paint by checking the manufacturer’s website or a Technical Data Sheet from your local distributor. Paints labeled “premium” or “super-premium” tend to be higher in volume solids.
Choosing Your Exterior Paint Colors
One of the hardest steps in painting your home’s exterior is settling on the perfect color. Here are some tips to help you narrow down your options:
- Consider the elements that are hardest to change. Surfaces like roofs, stonework and driveways are not likely to change, so take them into consideration when choosing exterior colors. The colors you choose should tie these fixed elements together.
- Consider the architectural style of your home. If you have a classical federal-style home, you don’t want to paint it burnt orange — and if your home is a New England saltbox style, a pale mint green is going to look bad. The color scheme you choose should match the style and era of your home.
Many paint manufacturers make collections of historically accurate colors. If you need some inspiration, browsing these collections is a good place to start. You can also speak with a professional who specializes in historical paints.
- Think about the visual effect you’d like. If your home sits far back from the road and is behind a few trees, you might want to pick a brighter color so it stands out. If you’d like your home to blend in more, a darker color is a better choice.
- Choose three or more shades of paint. Exterior schemes typically feature three major elements:
- The field color, which is the dominant shade
- The accent color, which brings smaller elements like doors and shutters to life
- The trim color, which is used for roof edging, railings, window casings and other trim work
Your trim and field colors should be contrasting. If your field color is dark, a pale shade like white will probably be best for the trim. As for accent colors, you can be bold, but don’t get carried away — bright red looks great on a door, but not on your shuttles and gables.
If you don’t feel confident enough to create your own custom color scheme, take advantage of the preselected color palettes offered by most major paint brands.
- Don’t rely just on paint chips. A shade of paint can look a lot different on a wall than it does on a chip. So, to ensure that you have the color you want, buy a quart of the paint and test it out on a less-seen area of your house. Study how it changes with the light and under different weather conditions. This will help you make sure you’ll be happy with the color for a long time.
How to Prepare Your Home’s Exterior for Painting
The best way to get a good paint job is to start with proper preparation. If the underlying surface isn’t ready for paint, paint won’t stick properly and won’t give you that fresh, clean finish you want.
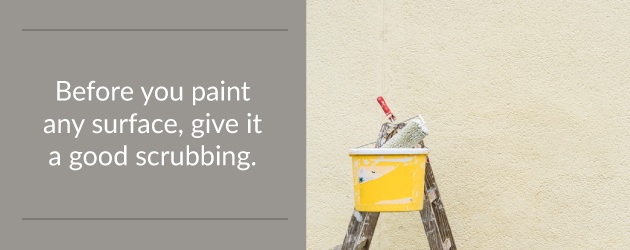
1. Wash
You can definitely wash your house before painting it. This will remove dirt, mildew and other residues that make it difficult for a new coat of paint to stick. Contractors use pressure washers to complete this task, although if you’re inexperienced with this equipment, you could end up gouging your wood or shattering your windows. Although a bit slower, washing with a regular hose and scrub brush will get the job done just as effectively.
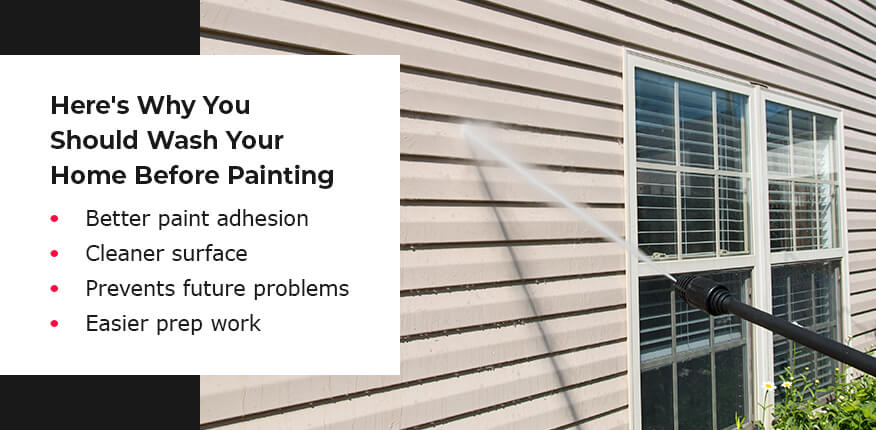
Cleaning the exterior of your house before painting is a great exterior painting tip and a vital step for any exterior painting job. Here’s why:
- Better paint adhesion: Washing your house before receiving paint services helps remove dirt, dust and other contaminants that can interfere with the paint’s ability to adhere to the surface. This will help the new paint last longer and look better.
- Cleaner surface: Washing your house before painting removes unsightly stains, mildew and other discolorations that can detract from the appearance of your home.
- Prevents future problems: Painting over a dirty or contaminated surface can lead to issues such as peeling or flaking paint.
- Easier prep work: Washing your house before a professional comes to paint can make prep work more manageable, as it can remove loose paint and make it easier to spot any areas that need repair.
Before you start scrubbing, protect plants by spraying them with water, saturating the soil underneath, pulling the plants away from the walls and covering them with fabric drop cloths. Lay extra drop cloths next to the house to catch any falling debris. Wet the walls and wash with a mixture consisting of:
- 1 gallon of water
- 1 cup of chlorine bleach
- 1 cup of concentrated, phosphate-free cleaner
To avoid streaks, work from the bottom up. Rinse the walls thoroughly before the cleaning mixture dries.
2. Scrape
If there is any paint that is peeling or bubbling, you need to remove it. However, if your house was built before 1978, there is a good chance that the paint contains lead. You can confirm the presence of lead by sending a paint chip sample to a lab.
If your house is coated in lead-based paint, you must take extra precautions to protect yourself and those around you from toxic dust. Lead paint removal may be subject to federal, state or local regulations. If your paint is free from lead, all you have to do is to wear a dust mask and put down drop cloths to catch falling debris.
Scraping by hand is demanding on you but much less damaging to the wood than other methods like power sanders and grinders. You can expedite this process by softening the paint with a heating gun.
3. Sand
After you remove all loose paint, step back to see what is left. If the remaining paint is sticking well and there aren’t too many bumps, you can smooth the difference between the paint and the bare surface with 50- to 80-grit sandpaper.
You can get this job done quickly with a pad sander or an electric random-orbit sander. Make sure there is a smooth transition from the old patches of paint to the exposed surface. For parts of the house that are particularly visible, you can follow up with a 100- to 120-grit sanding to eliminate scratches.
If less than half of the paint is remaining, it might be best to just remove all of it. To get rid of tough spots, you can use shrouded grinders or chemical or infrared strippers, then sand again to make sure the surface is smooth.
If you choose a random-orbit sander to do your paint removal, make sure to use a respirator. If you’re just sanding by hand, a dust mask is all you need.
4. Patch and Fill
Once you’re done sanding, the next step is to fill in the minor dents and cracks. This is also the time to repair or replace any pieces damaged by rot. The type of filler you’ll want to use will depend on the type of finish on the exterior of your house.
For deep cracks or rotten holes, it’s best to use two-step epoxies. Don’t use caulking on the cracks just yet — wait until you’ve primed everything.
5. Prime
Primers are designed to create a good surface for your paint to adhere to. They can be used on filler, bare wood, epoxy or deteriorated paint. If your surface is clean enough, you don’t need to do any priming.
For most surfaces, you can use an acrylic primer. For cedar and redwood, however, use oil-based primers because water-based primers will allow rusty, reddish-brown stains to leach out of the wood.
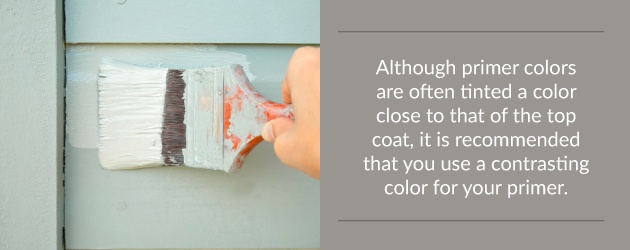
Although primer colors are often tinted a color close to that of the top coat, it is recommended that you use a contrasting color for your primer. This way, when painting the top coat, you can easily see if you’ve missed a spot because the primer color will be easily visible.
6. Caulk
The last step before painting is caulking. This step involves sealing not only the cracks in the wood but also the joints where two different materials meet, such as door frames, window frames, molding and fascia boards.
If you have an old stucco surface with chips or pits, they must be patched with new stucco and then given time to cure. If your wood siding or fascia boards are rotting, replace them. Sand wood trim and doors gently to create a surface ideal for painting.
Spray Paint vs. Paint Rollers
Spray painting and painting with a roller offer different advantages for a home’s exterior. Spray painting can be quicker, as it covers large areas quickly and easily. However, it also requires more equipment and accessories, while painting with a roller only requires the paint roller and tray. Let’s look into more benefits of each style of painting:
Advantages of Spray Paint
We have already mentioned that spray painting can be faster. Here are other advantages:
- Smooth finish: Spray paint creates a smooth and even finish. It is particularly useful for modern homes that feature clean lines and flat surfaces.
- Conserves paint: Spray painting often uses less paint than rolling or brushing, as the paint is evenly applied without excess dripping or splattering.
- Versatile: Spray paint can be effective on various surfaces, including wood, stucco, brick and metal.
- Professional-looking finish: Spray paint creates a high-quality finish, especially when applied by an experienced painter with the right equipment and skills.
Advantages of Paint Rollers
Using paint rollers is the traditional method of outdoor house painting. Professional painters often use paint rollers, as spray painting may not provide the best results in certain areas or situations. For example, if your house is close to your neighbors, spray painting may not be the ideal choice. Here are some advantages of having professionals paint the outside of your house with paint rollers:
- Better for textured surfaces: This method is better for textured surfaces, as it allows the paint to fill in the crevices and create a more even finish.
- Control: Using a paint roller offers more control over the paint application. Painters can control the amount of pressure and coverage.
- Easy to touch up: This method makes the paint easy to touch up. Painters can reapply paint to the affected area easily.
Painting Your Home’s Exterior
Paint the Walls
With the surface preparation completed and your materials picked out, you’re ready to paint your exterior walls. The recommended way to paint it is called spraying and back-rolling, which requires two people. One person uses a spray to spread paint across the wall quickly and evenly. The other person follows behind and runs a roller over the sprayed paint. This method delivers an even finish. Make sure to protect your windows by covering them with plastic or using a sprayer with a shield.
If your budget allows it, apply a second coat after the first one has fully dried. This is more necessary for vibrant hues — as sometimes a second coat is needed to get the full color — but is recommended for all shades.
Paint Everything Else
Once you finish the walls, you can then proceed to paint everything else, which includes the doors, molding, fascia and shutters.
For this job, you should use a brush — and a high-quality one, which will cost between $12 and $22. Avoid cheap brushes, as they may shed bristles into the paint. Angular sash brushes are also to be avoided, as they only work for windows. If you are using latex paints — which is recommended — make sure to buy at least two flat head 2 1/2-inch synthetic bristle brushes.
Number of Coats
As you’re painting the exterior surfaces, the number of necessary coats varies depending on:
- The condition of the surface: One coat may be sufficient if the surface is in good condition and has no major flaws or discolorations. However, if the surface is damaged, has a lot of chalking or has been previously painted with a darker color, multiple coats may be needed.
- The color and type of paint: Darker colors and certain types of paint may require more coats than lighter colors.
- The quality of the paint: Higher-quality paints may require fewer coats, as they tend to have better coverage and adhesion.
In general, most exterior paint jobs will require at least two coats of paint. This allows for better coverage and added durability and protection against the elements. Some painters may even recommend applying a third coat in certain situations.
It’s always best to consult a professional painter for exterior home paint services. They can help ensure your new paint is long-lasting and beautiful.
Tips for Painting Your Home’s Exterior
Here are some general exterior painting tips to keep in mind as you’re painting:
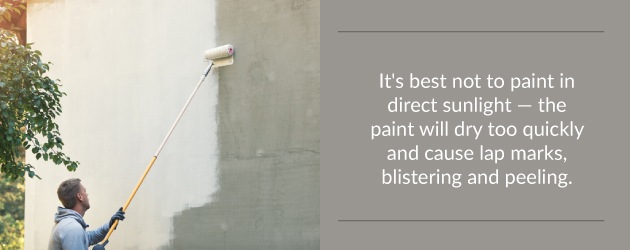
Check the weather. It’s best not to paint in direct sunlight — the paint will dry too quickly and cause lap marks, blistering and peeling. High winds can also dry the paint too quickly, and blow dirt into your paint. Painting should also be delayed if it’s going to rain or if the temperature drops below 50 degrees Fahrenheit.
On an extension ladder, paint everything you can reach. If you’re on a 16-foot extension ladder, going up and down every few minutes can be time-consuming. So paint everything you can comfortably and safely reach before moving up or down the ladder. Learning to paint with both hands will double your reach.
Keep the can close. Hold your paint can close to the surface you’re painting — this will reduce your arm movement and minimize dripping.
Take down shutters. If you want the paint job on your shutters and doors to look as neat as possible, take them down and paint them on a well-protected patio. Once the paint has dried, rehang them.
Don’t tape your windows. Taping your windows before painting frames and sills is a huge pain and not worth the effort. An easy alternative: once the paint has dried, gently scrape off any drips with a razor blade.
Avoid lap marks. Lap marks refer to areas that appear darker as a result of painting over dried paint. To avoid these marks, you should work fast and paint in sections small enough that the previously painted section remains wet until you can brush the newly added paint into it. If you still end up with lap marks while adding your first coat, you can probably cover them up with your second coat.
Avoid brush marks. Brush marks appear at the beginning and end of a brush stroke. Luckily, you can avoid these by starting every stroke in an unfinished section, at an edge or against a window or door trim. Then, in a single movement, brush toward the finished area while sweeping the brush up and off the surface.
Choose your battles. Spend more time on highly visible areas such as around the front and back doors. Other places, like under the eaves, may not require the same attention to detail.
What to Do After You Paint
Here are a few things you can do to extend the life of your paint job:
- Inspect your caulk every year and replace any areas that are cracked or missing.
- Remove any mold or mildew that you spot.
- Wash away stains left by nesting birds and pollen.
- Touch up blistering and peeling paint before it spreads.
Quality Exterior House Painting Services From Shoreline Painting
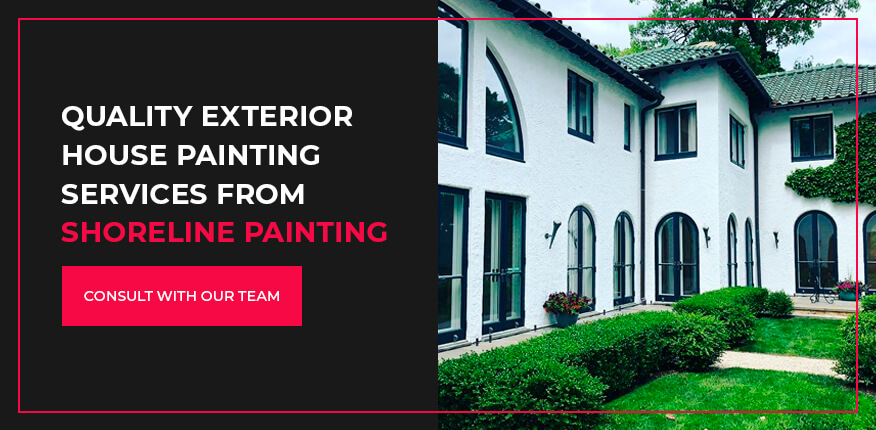
Exterior house painting involves a lot more than just slapping on a coat of paint. To all but the most hardcore do-it-yourselfers, it can be quite a daunting endeavor. If you’re feeling overwhelmed by all the steps and live in Fairfield County, CT, Westchester County, NY, or the surrounding areas, let the seasoned professionals at Shoreline Painting do the job for you.
We’re a family-owned company and have been in business since 1975. Our knowledgeable team has extensive training and is available to help you with any questions you may have. Contact us today to see what we can do for you.
Recent Posts


Follow Us


