Common Exterior Painting Mistakes
September 10, 2025
Did you know it takes 100 milliseconds to form an impression? The exterior of your home tells passersby something about you every day. A house with a professional finish makes a good impression before people even ring your doorbell.
However, some homeowners still want to DIY their exterior paint jobs. Without the proper tools, expertise and experience, painting your house can hurt its curb appeal. In this piece, we unmask exterior painting mistakes and provide tips on how a professional paint job from Shoreline Painting can help.
Poor Surface Preparation
Your siding takes a beating from the weather every day, so it is normal for it to accumulate dirt and grime over time. You may also notice signs of flaking, chipping and even mildew. Painting over these substances is not a solution. They must be washed off before any layer of paint can go onto your exterior.
If you don’t prepare your surface for exterior paint, it may fail to bond with the surface, causing the paint to chip sooner than expected.
The Professional Approach
- Thoroughly clean the siding: One of the first steps our professional painters will take is thoroughly washing the siding. Using a pressure washer, the painter will clean your exterior to improve the paint’s chances of bonding to the siding. If they spot mildew, painters will use bleach and water to handle it. Your painter will also guide you on how long to wait for the exterior to be dry.
- Scrap and sand: A scraper removes cracked or flaking paint to ensure an even finish. After scraping, your painter may use fine sandpaper to smooth the edges.
- Complete repairs: The final step in surface preparation is to fix minor visible issues. Before painting, your painter will address exposed nail heads, small cracks and other surface damage.
Ignoring the Weather
Weather plays a significant role in the curing stage of exterior paint. Painting during extreme heat, humidity or cold can result in an unsightly finish. For instance, painting the exterior in hot temperatures will cause the paint to dry quickly, leaving your home with lap marks. Lap marks are darker sections or marks on the siding where a second coat of paint went over a dry first layer. However, if you paint your home before the rain, the paint will fail to cure and run.
The Professional Approach
- Check the forecast: Shoreline Painting’s experienced painters check the weather forecast so they can select a day with clear skies. Instead of picking the first day with clear skies, our exterior paint advice is to choose a day following several clear-sky forecasts.
- Mind the temperature: Most manufacturers detail the best working temperature for their products to give you the perfect finish. The optimal painting temperature for the right finish is usually between 50 degrees Fahrenheit and 85 degrees Fahrenheit.
- Avoid direct sun: Staying away from direct sun will protect the paint from drying quickly, making it hard to work with. You will likely see your painter working under shaded areas when they can.
- Watch humidity: Too much moisture can slow drying, leaving the paint sagging.
Choosing the Wrong Products
Product quality plays a significant role in the final aesthetic of the house. Buying low-quality paint or even the wrong kind of paint can compromise the durability and weather resistance of your siding.
If you are working on an exterior project, you need high-quality paint. Resist the urge to use interior paint for an exterior project, as it lacks the formulation to protect exterior surfaces.
Another common product mistake is skipping the primer. Although it has often been treated as optional, primer is necessary for a lasting paint job.
The Professional Approach
- Buy quality exterior paint: The best purchase for an exterior painting project is a 100% acrylic latex paint. These premium paints are designed with color retention and anti-peeling technology, ensuring the paint keeps its luster for years.
- Don’t skip the primer: A layer of primer helps create strong adhesion between the paint and surface. It also blocks oils, rust and tannins from different materials from leaking onto the paint. At Shoreline Painting, our well-trained experts will always apply primer to create an even base for the top coat.
- Use the correct primer: Our exterior painting tips go beyond purchasing the primer. You should buy the right primer to accommodate the porosity of your siding. Masonry siding will require primer specifically formulated for masonry, while wood siding will need a wood formulation.
Using Improper Techniques and Low-Quality Tools
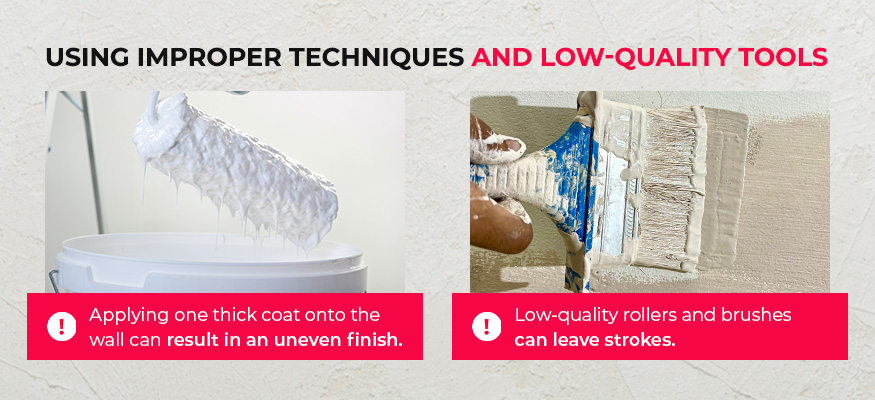
Employing improper painting techniques coupled with low-grade tools can result in a finish with visible marks and imperfections. Techniques like applying one thick coat onto the wall can result in an uneven finish. On the other hand, low-quality rollers and brushes can leave strokes. Some tools may even leave bristles on your siding.
The Professional Approach
- Invest in good tools: Quality painting tools are necessary to achieve a smooth, professional aesthetic. Superior painting tools, like those used by the outdoor painting specialists at Shoreline Painting provide a flawless finish that can withstand the test of time.
- Apply two thin coats: Instead of a heavy single coat approach, our professionals apply two thin coats to ensure drying consistency and an even finish.
- Maintain wet edge: The wet-edge painting technique helps avoid the formation of lap marks and picture framing. Painting over a surface while it is still wet allows the two coats to blend seamlessly. However, the wet-edge technique is not a one-man job, especially when working on a large home. It takes a team of trained professionals to help ensure an excellent finish.
Overlooking Safety
It can be easy to overlook safety when working on an exterior paint project. For example, one may forget to ensure the ladder is positioned correctly and securely. Another safety concern is lead-based paint. Homes that were built before 1978 used this paint type. However, removing lead-based paint poses safety risks for humans, animals and the environment.
The Professional Approach
- Practice ladder safety: Several safety techniques can limit the chances of accidents. The first exterior painting safety tip is to firmly plant the ladder on level ground. The second technique is the three-point rule, which ensures a constant three points of contact with the ladder. It could be two hands and one foot or two feet and one hand.
- Test for lead paint: For homes built before 1978, painters may request paint testing to ensure they can better protect you and your family. If lead is found on the house, you will need an EPA lead-safe certified company like Shoreline Painting to assist with the removal. An EPA certification means the contractor or painter has successfully completed the Renovation, Repair and Painting Program that equips them with the right tools to remove lead-based paints safely.
- Wear protective gear: Sanding throws dust and debris into the air, which could end up in the eyes or nose. Wearing protective gear like a mask, gloves and glasses can help enhance safety.
Get It Right the First Time With Shoreline Painting
Making a mistake when painting the exterior of your house is as easy as using the wrong paintbrush or incorrect timing. Don’t take the chance with your home and risk its curb appeal. Partner with a team of professionals who take caution to ensure your house gets a lustrous finish that will last. As a Fine Paints of Europe Master Certified Painter, we offer the premium Fine Paints of Europe in multiple colors and finishes to give your home an improved aesthetic. Contact us to get a consultation.