A Guide to Painting Molding and Trim
October 11, 2024
If you’re upgrading your interior walls with a fresh coat of paint, you should have a professional touch up the molding and trim as well. These functional framing features conceal cosmetic flaws in the joining walls and ceilings while adding dimension and architectural style. Painting the molding and trim is an opportunity to elevate the effects of vibrant new wall paint.
Extending your palette to dress up these decorative elements can transform your interiors. However, it’s key to choose the right complementing colors. It’s just as important to use the right type of trim paint and devote time and effort to prepping the surfaces for new paint. Choosing an experienced painting company like Shoreline Painting can streamline this process immensely.
This guide explains how to paint molding and trim for flawless results.
Choose a Trim and Molding Paint Color
Following a few guidelines can make coordinating a palette more straightforward. Instead of sifting through endless possible combinations, choose a darker or lighter version of your desired wall color. The contrasting effects of a deeper or darker hue can add visual depth to a room. On the other hand, a lighter color can highlight these decorative elements and make them stand out.
Sticking to the same color for molding and trim in the main areas of your home can unify your interiors. A more personalized palette can work well in bedrooms and bathrooms. When changing things up in different rooms, keep to the same color temperatures to maintain a visual flow from one room to the next.
A few popular interior paint colors include blue-gray neutral shades, blue and violet blends and blue-green hues. Rich browns, warm reds and pastel tones are also trending this year. You can also use your home’s interiors to find inspiration from existing colors.
Types of Paint for Molding and Trim
The type of paint you choose can impact durability, maintenance and visual results. Interior trim needs a durable paint finish that can withstand wear and tear from shoe scuffs, vacuum cleaner bumps and furniture scrapes.
These paint finishes work well with interior trim:
- Gloss paint: High-gloss and semi-gloss paint are the most popular choices for interior trim painting. High durability, moisture resistance and low maintenance make gloss paint ideal for kitchens and bathrooms as well. However, the high sheen value can highlight imperfections like brush strokes and surface flaws.
- Satin paint: This elegant paint finish has a lower sheen value than gloss paint, although it is more reflective than flat matte paint. Satin paint is durable enough for interior trim and relatively easy to keep clean.
- Eggshell paint: An eggshell finish is slightly matte with a subtle sheen similar to the surface of an eggshell. This durable paint finish is a great choice for cupboards and doors and can work well on trim and molding.
Preparation for Painting Molding and Trim
Whether you choose a soft eggshell finish or a shiny high-gloss paint, properly preparing the surface is essential. The quality of the prep work will impact the results. Knowing how to sand trim is essential because shiny paint finishes tend to highlight imperfections, making surface flaws stick out even more.
Prepping interior trim for a coat of paint may take time, but the extra effort can ensure flawless, long-lasting results. Fortunately, our team at Shoreline Painting knows the right tips and techniques to yield high-quality results.
Here are the steps we use to prep trim and molding for a coat of paint:
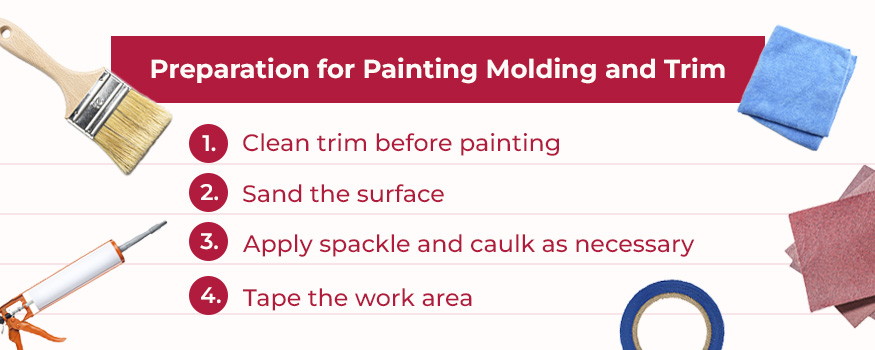
- Clean trim before painting: This step removes any dust and dirt that can affect results. Our painters use a damp sponge and a mild detergent to clean the surface. They’ll also use a ladder to reach crown molding, door casings and the tops of window trim.
- Sand the surface: If the trim is new, we’ll use 120-grit sandpaper to smooth away the sheen from the trim surface. For molding, we’ll use a 220-grit sandpaper. We then use coarse 80-grit sandpaper to buff away any visible flaws, then switch to a less coarse 100- or 120-grit sandpaper to smoothen and even out the surface. Lastly, we’ll remove sanding dust with a damp sponge.
- Apply spackle and caulk as necessary: Next, we’ll fill holes and cracks with a lightweight spackling product and a putty knife. After waiting for the product to dry thoroughly, we’ll use 220-grit sandpaper to smoothen the surface. We’ll also fill any gaps between walls and trim with caulk.
- Tape the work area: Next, we’ll neatly run painter’s tape along the floor, covering the space where the floor meets the trim. We’ll add a second strip to protect a slightly wider area from potential paint splatter. If you have carpeting, we’ll use a putty knife to press the carpet edge and tuck a strip of painter’s tape between the carpet and trim.
Priming Interior Trim
Primer serves as a base coat that treats the surface and gives the paint something to adhere to. It can also make your paint last longer. While you can use an all-purpose primer, an oil-based product is best for enamel paints.
Here are the steps our painters use to prime trim for long-lasting results:
- Follow the instructions on the primer product.
- Use a ladder to prime crown molding and the tops of window trim.
- Apply one to two coats of primer to the trim, carefully covering the entire surface. Allow drying time between coats.
- Use 120-grit sandpaper to smoothen the surface and buff away any brush strokes.
- Remove dust with a damp sponge.
Painting Interior Trim
Painting with a shiny finish requires precise brush stroke motions. At Shoreline Painting, we use a high-quality angled paintbrush to coat the interior trim. The angled edge allows optimal precision for these kinds of surfaces.
Here is how we paint molding and trim with a sheen-finish paint:
- Dip about an inch of the brush into the paint and wipe away any excess.
- Use a ladder when painting crown molding.
- Use short, horizontal brush strokes to move along the length of the trim.
- Smooth away brush strokes with shorter, lighter motions, then use long brush strokes.
- Apply a second coat of paint with the same brush stroke motions.
Elevate Your Molding and Trim With Shoreline Painting
Between picking out the perfect color scheme, properly preparing the trim surface and carefully coating the paint to smooth away brush strokes, painting trim and molding can be a time-consuming project.
Shoreline Painting can upgrade your molding and trim with high-quality interior paint and meticulous artistry. As a Fine Paints of Europe Master Certified Painter, you can trust us to transform your interiors with luxury paint. Our team of expert artisans can apply gloss paints for flawless results.
If you live in Connecticut or New York, contact us online for all your interior and exterior painting needs. Our experts can help you coordinate your color palette and choose the right types of paint to elevate your home with luxury.